# ChatGPT 学术优化
**如果喜欢这个项目,请给它一个Star**
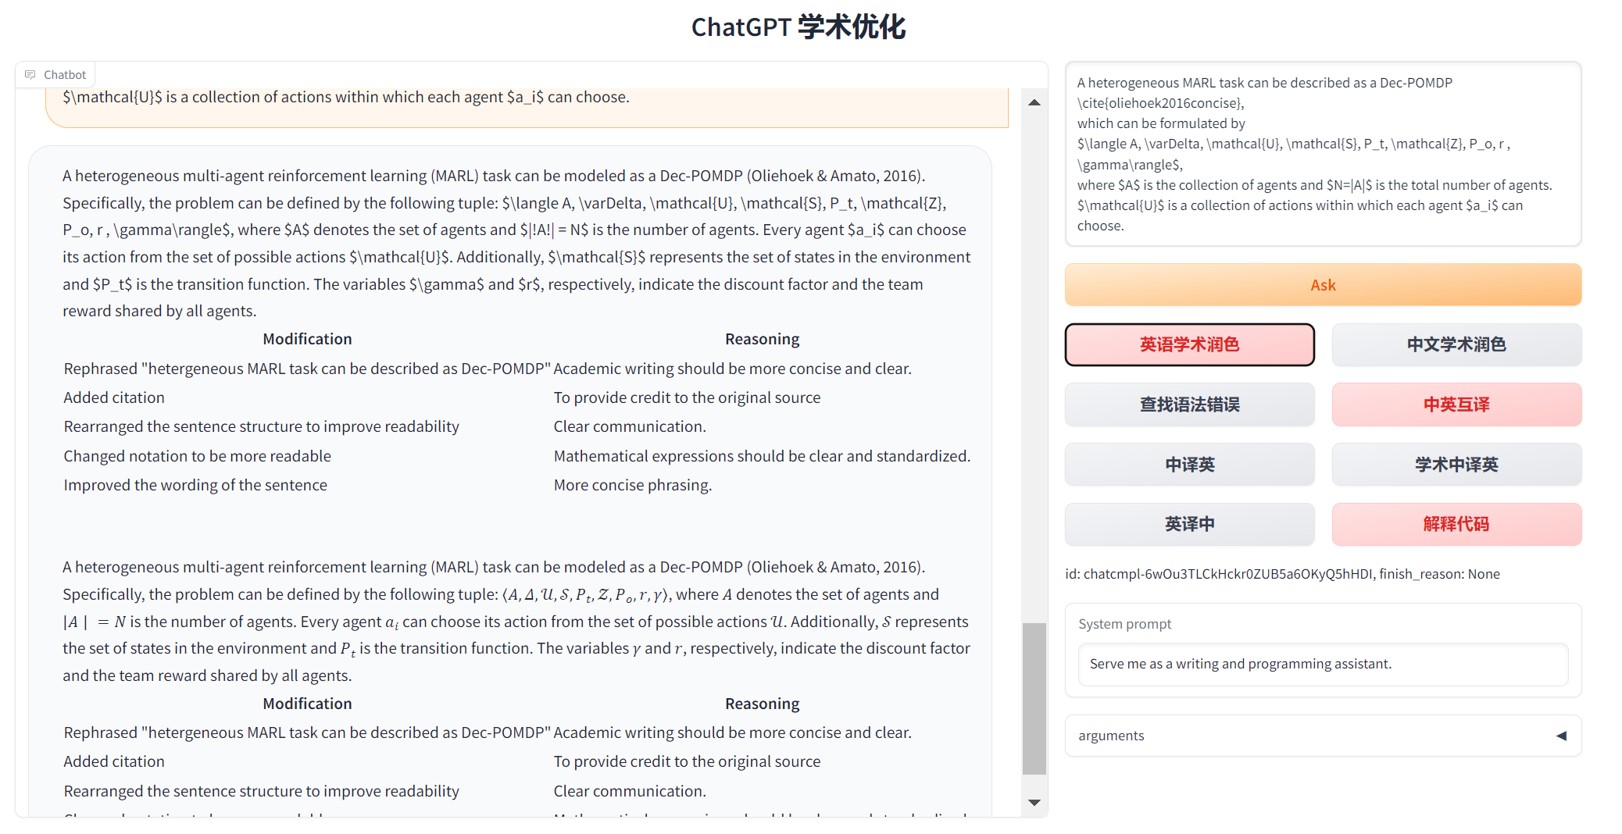
- 支持GPT输出的markdown表格
- 如果输出包含公式,会同时以tex形式和渲染形式显示,方便复制和阅读
- 所有按钮都通过读取functional.py动态生成,可随意加自定义功能,解放粘贴板
- 代码的显示自然也不在话下 https://www.bilibili.com/video/BV1F24y147PD/
## 直接运行 (Windows or Linux)
```
# 下载项目
git clone https://github.com/binary-husky/chatgpt_academic.git
cd chatgpt_academic
# 在config.py中,配置 海外Proxy 和 OpenAI API KEY
- 1.如果你在国内,需要设置海外代理才能够使用 OpenAI API,你可以通过 config.py 文件来进行设置。
- 2.配置 OpenAI API KEY。你需要在 OpenAI 官网上注册并获取 API KEY。一旦你拿到了 API KEY,在 config.py 文件里配置好即可。
# 安装依赖
python -m pip install -r requirements.txt
# 运行
python main.py
```
## 使用docker (Linux)
``` sh
# 下载项目
git clone https://github.com/binary-husky/chatgpt_academic.git
cd chatgpt_academic
# 配置 海外Proxy 和 OpenAI API KEY
config.py
# 安装
docker build -t gpt-academic .
# 运行
docker run --rm -it --net=host gpt-academic
```
## 自定义新的便捷按钮
打开functional.py,只需看一眼就知道怎么弄了
例如
```
"英译中": {
"Prefix": "请翻译成中文:\n\n",
"Button": None,
"Suffix": "",
},
```
## 配置代理
在```config.py```中修改端口与代理软件对应


## 参考项目
```
https://github.com/Python-Markdown/markdown
https://github.com/gradio-app/gradio
https://github.com/polarwinkel/mdtex2html
https://github.com/GaiZhenbiao/ChuanhuChatGPT
```


